Backstage
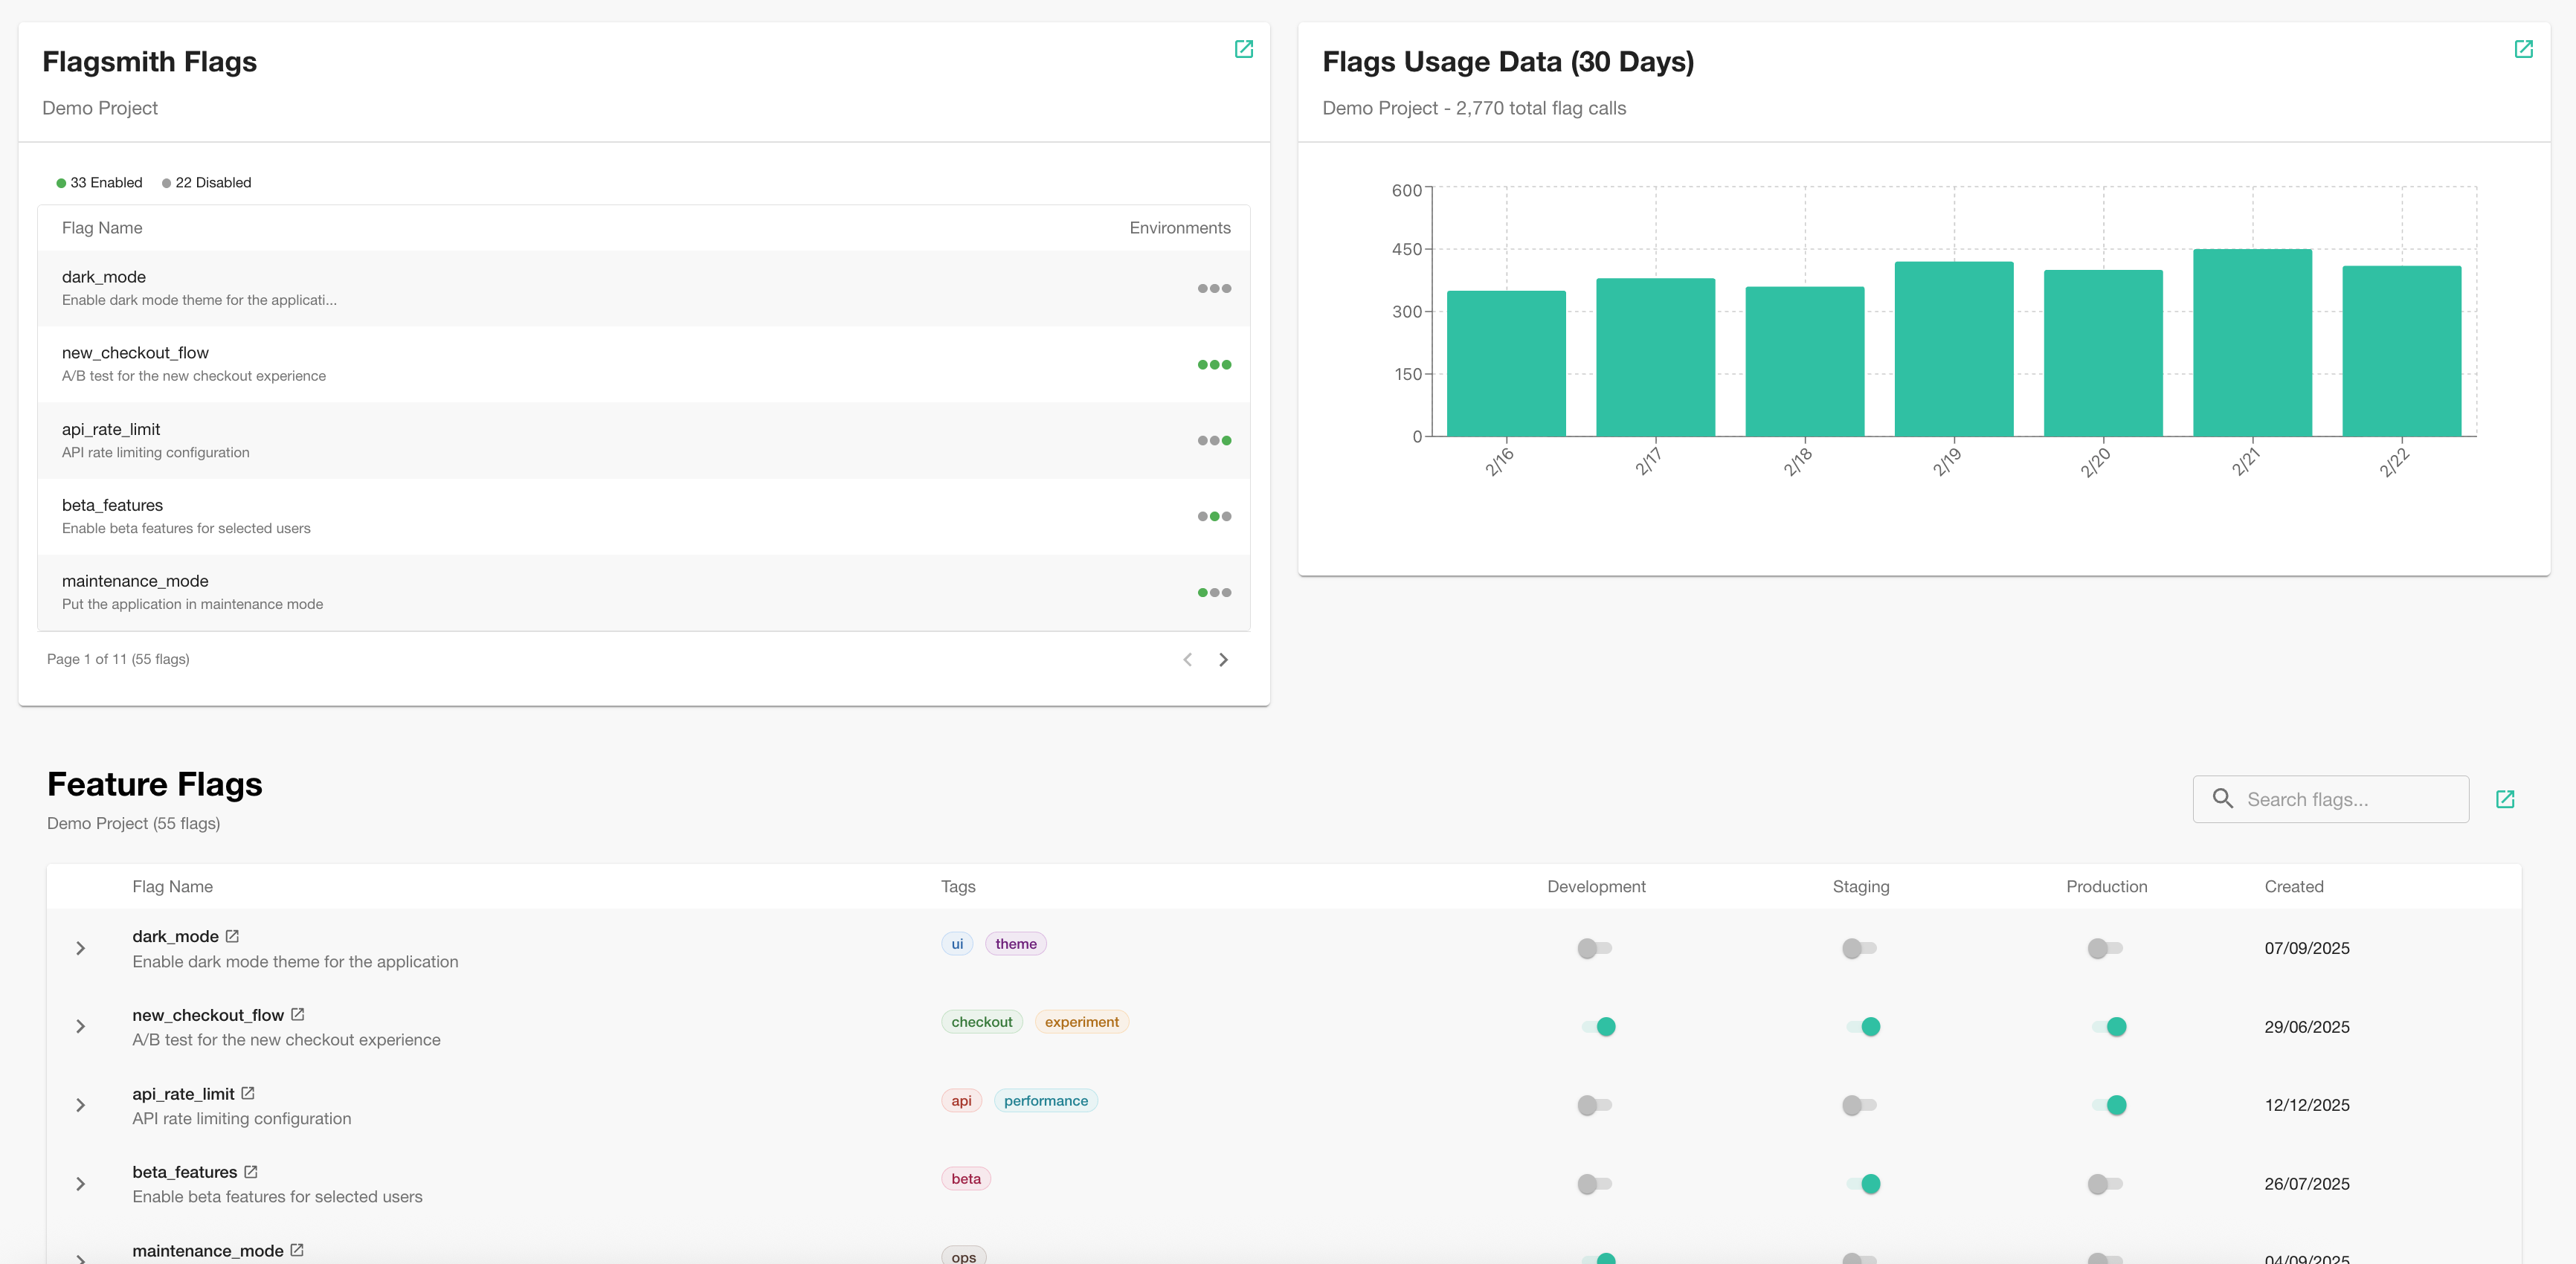
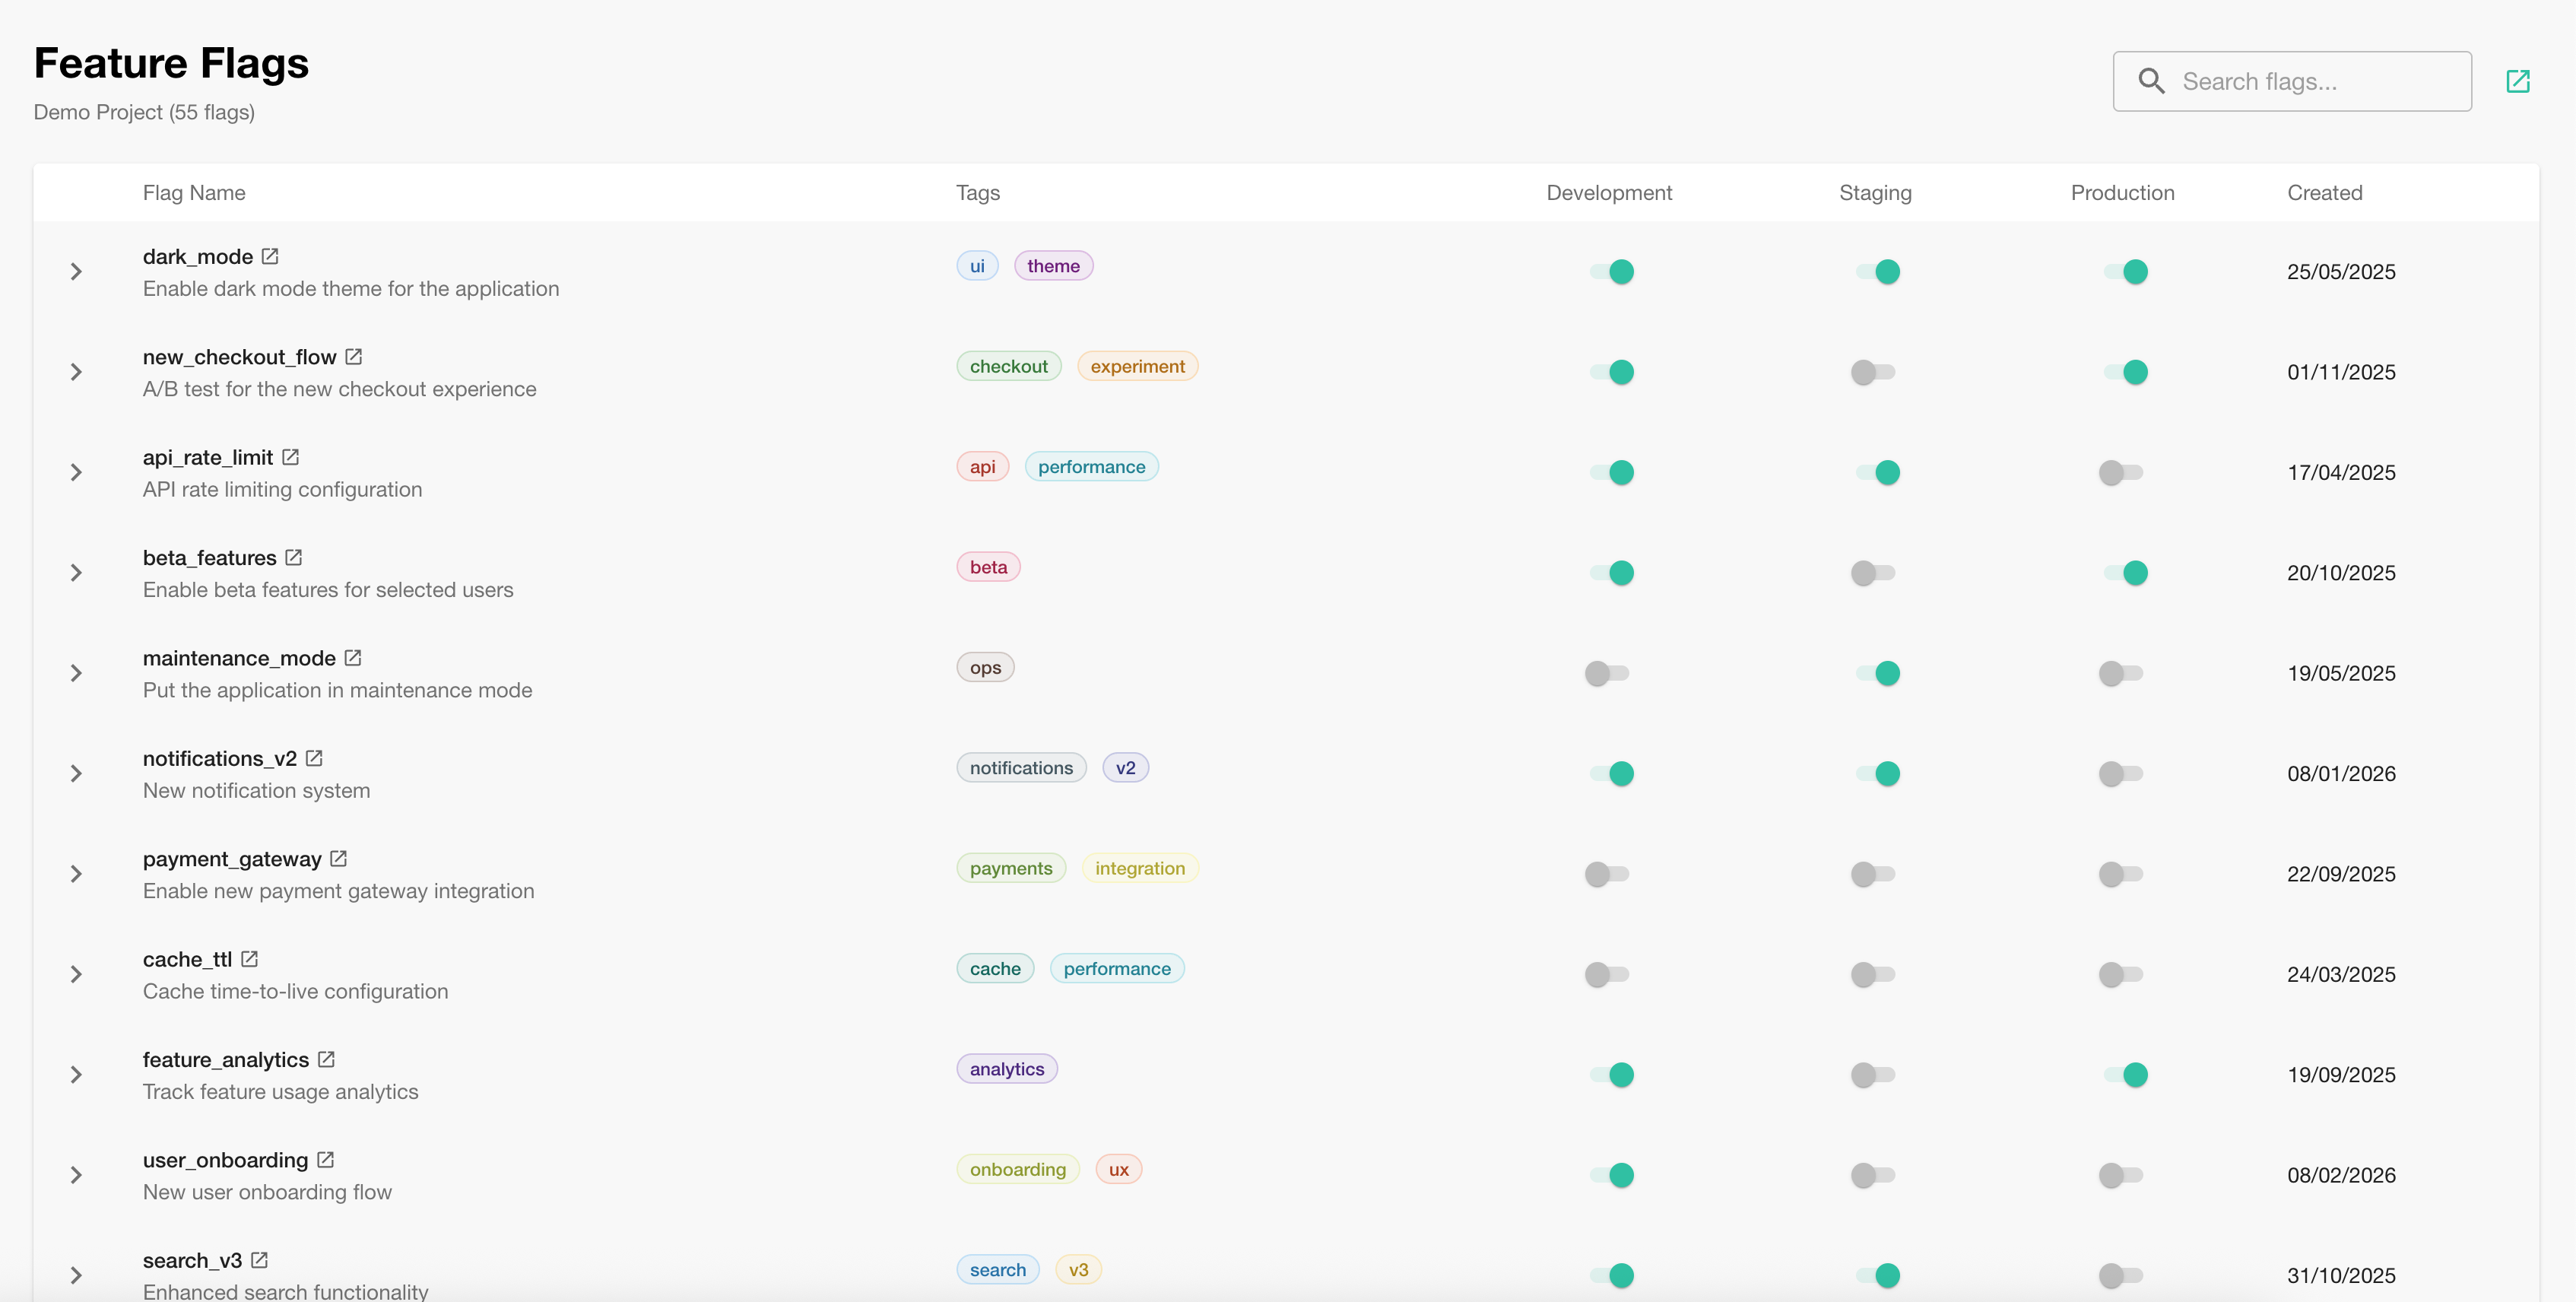
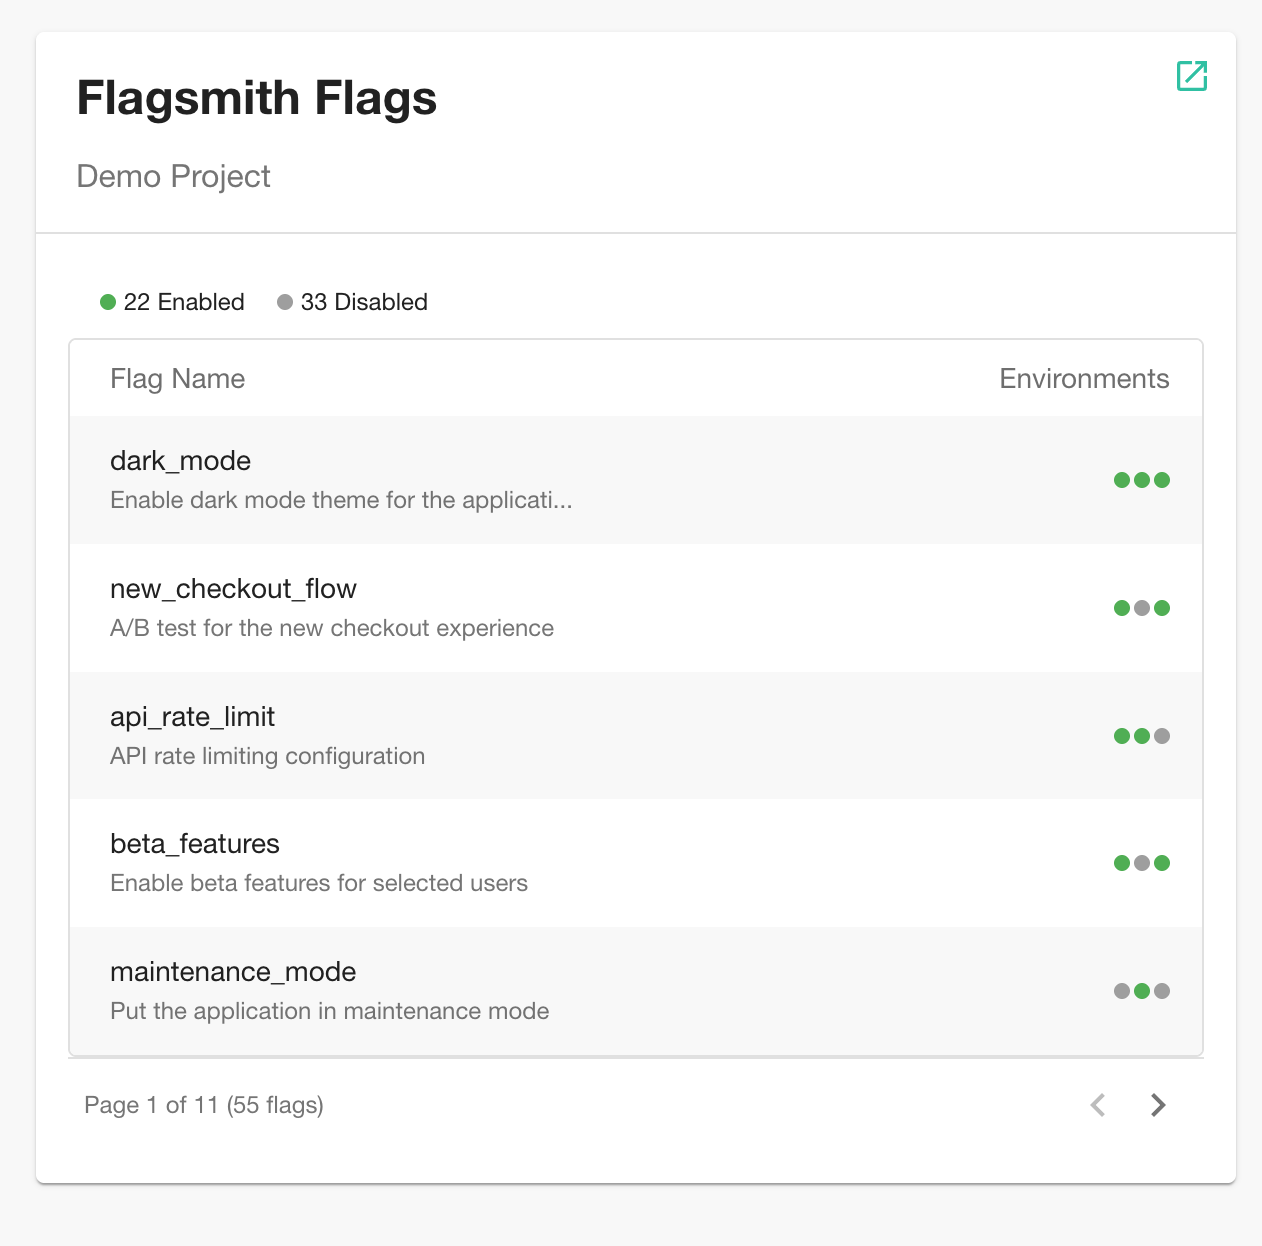
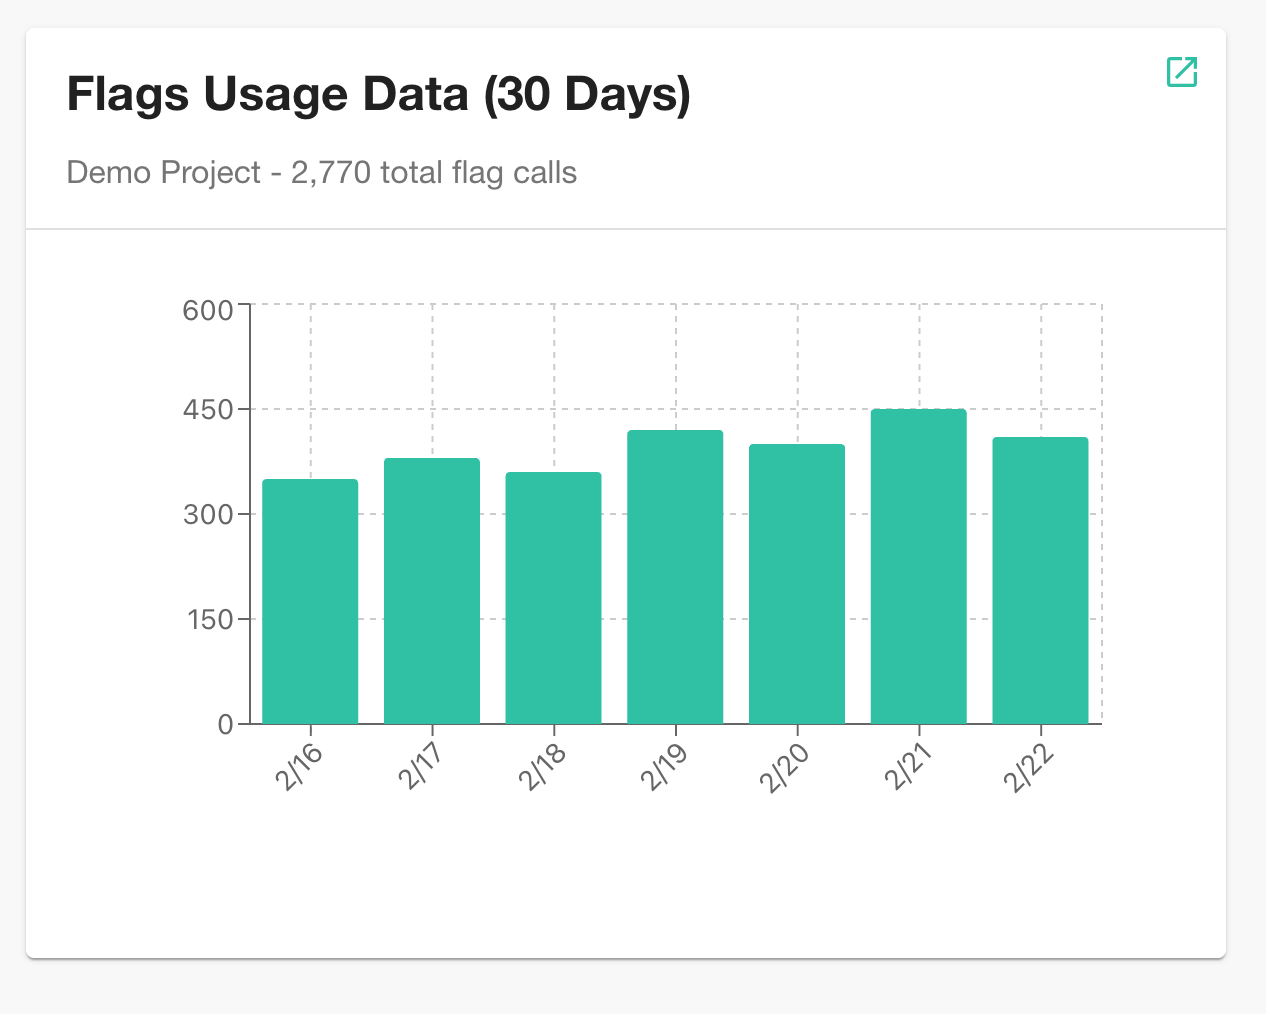
The Flagsmith Backstage Plugin brings feature flag management directly into your Backstage developer portal. It provides three components:
- Feature Flags Tab — A full flag list with environment states, tags, and toggle status.
- Overview Card — A quick summary of your feature flags for entity overview pages.
- Usage Card — A chart showing flag usage metrics over time.
Prerequisites
- A running Backstage instance.
- A Flagsmith account with an Admin API Key.
- Your Flagsmith Project ID.
Installation
Install the plugin from your Backstage app root:
yarn --cwd packages/app add @flagsmith/backstage-plugin
Configuration
Add the Flagsmith proxy configuration to your app-config.yaml:
proxy:
  endpoints:
    '/flagsmith':
      target: 'https://api.flagsmith.com/api/v1'
      headers:
        Authorization: Api-Key ${FLAGSMITH_API_TOKEN}
If you are self-hosting Flagsmith, replace the target URL with your own Flagsmith API address, e.g.
https://flagsmith.example.com/api/v1.
Adding Components to Entity Pages
Edit your packages/app/src/components/catalog/EntityPage.tsx to add the Flagsmith components.
Feature Flags Tab
Import and add the FlagsTab as a new tab on your entity page:
import { FlagsTab } from '@flagsmith/backstage-plugin';

// Inside your entity page layout, add a new tab:
<EntityLayout.Route path="/feature-flags" title="Feature Flags">
  <FlagsTab />
</EntityLayout.Route>
Overview Card
Add the FlagsmithOverviewCard to your entity overview page:
import { FlagsmithOverviewCard } from '@flagsmith/backstage-plugin';

// Inside your overview grid:
<Grid item md={6}>
  <FlagsmithOverviewCard />
</Grid>
Usage Card
Add the FlagsmithUsageCard to display flag usage metrics:
import { FlagsmithUsageCard } from '@flagsmith/backstage-plugin';

// Inside your overview grid:
<Grid item md={6}>
  <FlagsmithUsageCard />
</Grid>
Entity Annotations
Annotate your entities in catalog-info.yaml so the plugin knows which Flagsmith project to display:
apiVersion: backstage.io/v1alpha1
kind: Component
metadata:
  name: my-service
  annotations:
    flagsmith.com/project-id: '<YOUR_PROJECT_ID>'
spec:
  type: service
  owner: my-team
  lifecycle: production
| Annotation | Required | Description |
|---|---|---|
flagsmith.com/project-id | Yes | The numeric ID of your Flagsmith project. |
Getting Your Credentials
Admin API Key
- Log in to Flagsmith.
- Navigate to Organisation Settings → API Keys.
- Click Create API Key and ensure Is admin is enabled.
- Copy your Admin API Key.
Project ID
- Open your Flagsmith project.
- Go to Project Settings → General.
- In the JSON data dropdown at the top, select Project.
- The Project ID is the numeric
idvalue (not theuuid). For example, if you see"id": 1, your Project ID is1.
You may need to enable JSON references in your Account Settings to see the JSON data dropdown.